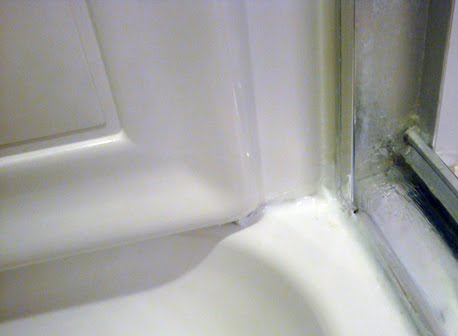
You know you have a problem, when you question whether or not you are actually getting clean in the shower. Well, this may be an over exaggeration, I clean my shower on a normal basis, but I need to get my point across. Justin and I have owned our home for almost two and half years and it is starting to show. The baseboards need a good wipe down (on my list) and up until now, the shower has been ok with getting a good scrub every couple weeks. However, when I noticed that the grime doesn't scrub out of some corners and joints anymore, I decided it was time to recaulk those areas and what better time than the present, right? So, when Justin picked up a whole day of refereeing middle school basketball games last weekend, I jumped at the chance to tackle this project solo mio.
Within a couple hours time, I removed the old caulk, gave it a good cleaning, let it dry, and sealed it back up with new stuff. You may think I'm crazy to post photos of the nastiness in my shower, but once again, I need to get my point across and give justice to the before and after transformation. These are the areas that gave me the willies.
Right corner:
Left corner:
Middle:
Gross huh?
To complete my project, I rounded up the necessary tools.
1. White silicone kitchen and bath caulk
2. Flat nosed screw driver (to dig out old caulk)
3. Box cutter knife (to cut and dig out old caulk)
4. Putty knife (to dig out old caulk and smooth new caulk if needed)
The first step was to remove the old caulk. Between my tool selection, I mainly used the knife and screw driver. I was able to make a few cuts, peel, and dig up the old stuff. FYI: If you use the knife, make sure you don't cut into the actual shower or bath surround.
Here are the problem areas free of their old caulk and already looking much better!
Right corner:
Left corner:
Middle:
Then, I cleaned the entire shower with some bleach water and cleaner. Once it was completely dry, I was ready to seal it up again with fresh caulk. (Make sure the areas are completely dry, otherwise you will have a problem applying the new caulk, it won't stick to the surface because it is waterproof.) The builder had used clear caulk originally, but I chose to replace it with white so that it had a nice crisp look.
The trick to caulking is to apply a small bead (thin line) of it
and smooth it out.
You can buy plastic tools that can be used to smooth and remove the excess but I used my finger instead. I have found that your finger is just as good as a $10 piece of plastic. And in a few short hours I had clean pristine shower corners.
Right corner:
Left corner:
Middle:
What a transformation! I will admit that this wasn't the most fun way I could have spent my husband-free Sunday, but it makes a huge difference and it's one thing I can cross off my list and not have to worry about for another couple years. Easy peasy! (If you plan on tackling your shower or bathtub, make sure you have an old rag on hand to wipe your finger off as you go, otherwise you could accidentally smear caulk everywhere. I'm speaking from experience.)
Note: I am not a professional carpenter, plumber, or electrician and the advice or steps I give are based on personal experience. In order to get professional results, it may be best to hire someone to do this job. If you are a professional and see that I have done this wrong, please let me know. I am always learning new things!
Thursday, January 21, 2010
Subscribe to:
Post Comments (Atom)


No comments:
Post a Comment
Do you have a question or just want to send a note? Leave it here!