

First, a little bit about our fabric selection. As I previously mentioned, Justin and I had a terrible time finding fabric that met our criteria, but in the end found the perfect stuff at Ikea of all places.

We chose Ikea's Majken fabric because 1) we loved the large graphic pattern, anything smaller would have become a texture on the wall and we wanted it to be bold; 2) the colors were exactly what we were looking for, there is one shade of green, the beige in the pattern matches our wall color exactly, the white background makes it appear lighter, and the black breaks up the neutral background; and 3) the fabric is a heavy duty 100% cotton, anything flimsier would have billowed when you walked by.
Before buying fabric, I remeasured the walls and found that this particular wall is closer to 18 feet rather than 17 feet, which meant we needed to get at least 6.5 yards of fabric to ensure the panel would be tall enough for the wall. At Ikea there was just about seven yards of fabric on the bolt and at $7.99/yard, we decided to take it all, spending about $60 total.
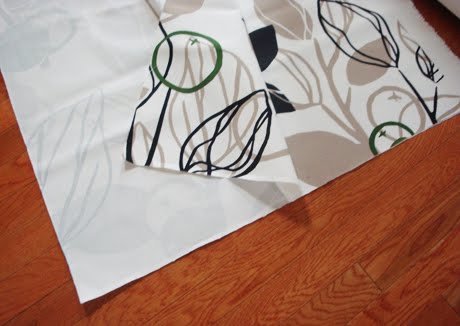
The fabric came 59" wide which meant my panels could be 29.5" but, as you can see, on the finished edges of the fabric, the pattern stopped taking 1.5" off from each side, making my workable width for each panel 28". Then I calculated hemming each side about 1/2" narrowing my finished panels to 27", just a few inches wider than the mirror but not as wide as the mirror's frame (see my mock-up below).

At home, I used the entire front entry way and down the mini-hall, separating the front of our house from the back of our house, to lay out the fabric for cutting.

To make my life simpler, I made sure the fabric was folded directly in half and then cut down the fold, making the two panel pieces.
To hem each side, I used Stitch Witchery, which is the same stuff I used to make the sideboard runner in our dining room.

I followed the steps on the back of the packaging to adhere the 1/2" hem on each side. No sewing machine for this project!

Hemming the fabric was a piece of cake, but brainstorming a way to hang the panels was another thing. I eventually decided to staple one end of each panel to a thin 1x4" (only $2!) that Justin cut down slightly narrower than the width of the panel.

Then I coaxed Justin into using our extension ladder to scale the 18 foot wall, all the way up to the ceiling and screw the 1x4s into the wall. To make his life easier, and less death defying, he pre-screwed about five screws into each piece of wood so that he could use one hand to hold the 1x4 on the wall and the other hand screw the screws in. After securing one screw, Justin said that is was much easier to screw the others in because he didn't have to hold the panel up anymore and could put all of his force into the other screws.

One little tool that made the hanging process a breeze was this little laser level that I bought for Justin a few years ago. Rather than measuring placement on the wall at the top of the ladder, we propped this guy on the mirror and he beamed a straight and level line all the way up to the ceiling.

A short while later, Justin had both panels hanging and ready to be tacked down at the bottom.

Our original plan was to secure the fabric to another 1x4 at the bottom and affix those to the wall, but at the last minute I decided to use the staple gun to tack them down. This way, the fabric lays flat against the wall.

And that finishes the tell-all tutorial on how we made and hung these fabulous show-stoppers.

This technique was such a breeze to accomplish, I can easily see myself using it in another room and I couldn't be happier about the outcome. Happy Friday!


I have been looking for this fabric for curtains...when did you purchase it?
ReplyDeletejoslyn260@yahoo.com
The fabric is from Ikea and it is wonderful. I just made curtains for our family room from the same pattern but different colors. Check it out here
ReplyDeleteWe do not have a Ikea store where I live but did find a wonderful lady on e-bay selling the same fabric. Excellent to deal with.
ReplyDelete