Showing posts with label our abode. Show all posts

Wednesday, August 17, 2011

Paint Chip Art

A few weeks ago, a couple bloggers (Sherry from Young House Love, Katie from Bower Power, Lana from Make A House A Home, and Emily from Style By Emily Henderson) challenged each other to create something inspired by a pin on their Pinterest board. They aptly dubbed it the "Pinterest Challenge: Summer Edition" and invited everyone else on the world wide web to play as well.


Well, this occurred during a weekend that I was completely swamped (I think I was throwing my garage sale, having a small get-together, and competing in another triathlon) but I was excited to jump on board for the following week. Much to my sadness, however, this Pinterest Challenge was only a one-week stint, so when I was stretching my fingers, reading to post about my follow-up Pinterest project, the blog-o-sphere was crickets. Nevertheless, my spirit wasn't crushed for good and I forged ahead creating a piece of art for our newly hung frame gallery inspired by one of my own pinterests.


When I saw this easy-peasy project from Jessica at How About Orange, I swung into the nearest store selling paint on my lunch break and selected an assortment of swatches.


Although I love the pattern Jessica created, I had to make mine different and decided on laying strips of the colors diagonally. To achieve the look I wanted, I first cut the swatches into 1" strips.


Then I started arranging them, and as I was playing with the color balance, I decided to cut the ends of the strips at a 45ยบ angle to add some interest to the otherwise boring strips. To keep the strips in place, I used some double-sided tape and trimmed to fit in my frame.


While I was working on this little diddy, Justin kept razzing me for playing around with paint chips, scissors, and tape but once he saw my piece hanging on the wall, those jabs stopped and he was impressed by how professional it looks.


Please do your best from the surrounding empty frames as you oogle my masterpiece. I think it's a great addition to the wall and I can't wait to share what I pop in the other frames.

(Not surprisingly, paint-chip art has been a-buzz across the interweb since it's nearly entirely free to make and easily customized. Check out Young House Love's success and One Project Closer's self-admitted fail.)

Monday, August 8, 2011

Stairway to Frames

Do you remember this post of yesteryear? It unveiled the painting transformation of our grandeous entryway and included these two photos of our barey-bare-bare staircase.


Well, I'm pleased to inform you that this staircase got its groove on.


I tackled the wall while Justin was frolicking in Australia for six weeks and aside from the missing artwork, we absolutely love it.


A few years ago I started slowly accumulating frames from thrift stores and garage sales after falling in love with framed galleries, especially in a stairway. (Cue these images from past posts.)

From this post.

From this post.

From this post.

However, after taking inventory of my stash recently, I realized I didn't like 1/2 of the frames I had been hoarding  (see a prelim arrangement from a year ago here). With that frustration and my intense desire to have this project done (and to get oodles of frames out of a guest closet), I took to my computer and started messing around with several arrangements. Strict grid? All one size? Mix of two sizes? Different colors? Various sizes and colors? I tried them all.

When it came down to it, I preferred the Tetris nature of the varied frame sizes and knew using all white frames would unify the arrangement. In my quest to find the most affordable frames, I checked out Target, Walmart, Ikea, Michaels, Hobby Lobby, and I think even Kohls, but Ikea was the victor because of price and size selection.

Before I dove right in hammering holes in the wall, I copied this approach and taped up paper "frames" to perfect my spacing. Then I measured where the hanger was on the back of each frame and tapped a nail through that spot on the paper template. Last, I tore the nailed paper frame off the wall and replaced it with the real deal. Pretty sweet, don't you think?


I already have tons of DIY art ideas for the frames (thank you pintrest) but am lucky enough to start out with this beautiful photo of Chicago by Dan Dry...


and this large typographic piece I created my sophomore year of college.


One of the best aspects about this project is the transformative power it had in our front entry. Now whenever a newbie enters our house a wow is generally uttered—even from the cable guy.

Friday, July 22, 2011

Frikowscul

I never thought I would ever have this on my coffee table...or anywhere else near my home.


But I do and I love it.


I picked up this cow skull after seeing it posted on Freecycle and was nervous to hear Justin's response once I got home. Though after a few months, ok maybe six or more, Justin has only jokingly jabbed me about it and I don't think it's going anywhere.


Yes, cow skulls generally adorn only the best southwest-style decor but I felt that there was something so crazy-modern-cool displaying it in our more contemporary living space that I couldn't pass up.


And that makes me happy, which every good husband knows happy wife, happy life.

Thursday, January 20, 2011

Craigslist Gems

$15 for this Thonet-lookalike trio. Need I say more?


(Maybe I should add that I'm on the prowl for some new fabric for those sad, sad seats.)

Wednesday, December 29, 2010

To The Map!

Justin and I came across these awesome vintage-looking maps at a little shop in the Andersonville neighborhood in Chicago, and now have a Rome street map hanging on our bedroom wall!


We picked the map of Rome to pay a special homage to our Italian honeymoon. (See all our pictures here.)


I love love love the white mat and frame highlighting the map's pastel colors. (This is the white version of the frame I used on this piece.) It is less visually heavy than our previous art and we really couldn't have lucked out with a better match to our room's palette.


As soon as I swapped the new for the old, it lightened the room almost as if it was a breath of fresh art (pun intended). And who can complain about the daily reminder of an unforgettable trip to beautiful Italia? Yeah, that's what I thought.

Monday, December 27, 2010

The Desk

Here's the desk for our office! In addition to adopting this awesome bookcase from Justin's grandma, we also snagged this amazing mid-century modern desk.


I'm not feeling the chair and think I have already found a replacement, but I sure do love the woodwork on the drawer and the round knobs.


I originally considered refinishing it, but after using it a few times, I have determined that I enjoy the worn surfaces and it's character too much to fix it up. The wood looks like it has been finished before (I'm assuming by Justin's grandpa) and when I see the parts where the stain streaks because it wasn't rubbed in completely, I like remembering him.

Now it seems we have all the furniture we need (or want) for this space. We've got this desk, the couch, and an open concept Vintage Modern, Thomas O'Brien bookshelf that has been sitting vacant in our basement for the past couple years—it's time to start arranging the layout.

Wednesday, December 22, 2010

Cushed MCM Couch

The progress on our office is slow going but I have finished a project that is going to play a huge part in the room—making cushions for our mid-century modern couch frame. Remember when I picked up the MCM couch and chair frames at my neighbor's estate sale for $5? I was super happy when I finished the cushions for the chair frames not too long ago and now these are done, I'm even more excited to share my handiwork. Check 'em out!


I bought the fabric during our trip to Mill End Fabrics in Rochester, Minnesota, and I followed the tutorial on Sew Mama Sew, which was just as easy as the first time but once again very time consuming. I hate to admit it, but it took me a whole Sunday to create the long seat cushion.


As you can guess by now, a dark blue color is going to play large part in our office's color palette, but we still haven't painted yet. The past couple weekends I have intended to paint but choosing a color is proving to be extremely difficult. Though, once I've got some color on the walls, I will share some pics.

Friday, December 3, 2010

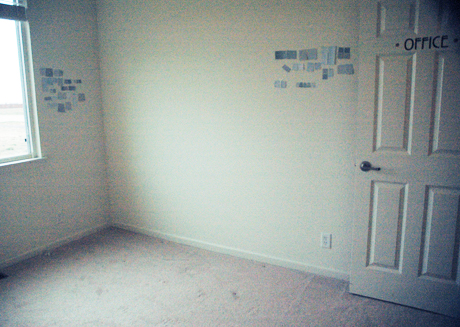
Empty office

After leaving you in suspense over our hoarder-esque office last week, I'm back to share evidence that we, in fact, do have a floor in there.


It took us a few days to unload everything, but having a clean slate to work with was so worth the effort and time.


I think when most people are completely redecorating a room they tend to sort through their belongings as they remove them from the space. I'm the opposite. As we start to put everything back in our office, I plan to go through and pare down. There's nothing worse than getting rid of a ton of stuff and then realizing you could have used that large leftover finial as a bookend.


So, now who's ready to see some color on those walls? I sure am. Stay tuned for more progress next week, it's going to be a doosie!

PS: If anyone has photography tips on how to reduce the graininess in my images, shoot me an email. I'm getting desperate!

Wednesday, November 24, 2010

Cushed MCM Chairs

I finally finished the necessary work on the pair of mid century modern arm chairs I picked up at an estate sale way too long ago (over a year—eek!). They weren't in bad shape but as you can see, they were missing some crucial parts.


I couldn't find webbing material similar to what remained on the chairs, so I opted for some woven straps that reminded me of cotton seatbelts and tacked them down using a staple gun.


The webbing didn't take long to replace but it took me a long time to make these cushions or should I say build up the nerves to get started. I'm no seamstress or upholsterer and was entirely intimidated with the task of making cushions for the chairs. At first I wasn't even sure how to start but after seeing a few similar chairs on craigslist and one identical match in Emily's room on the finale of HGTV's Design Star, I knew I could do it. So, with the first task of project-cushions accomplished, aka growing a pair, I was ready to get my hands dirty.

The second task was finding fabric, which speaking from experience, I knew wasn't going to be easy. I had three basic criteria I needed the fabric to fulfill: 1. neutral color, 2. upholstery quality, 3. I had to like it. Pretty simple huh? Well, let's just talk about that. First I scoured my go-to discount shop in Chicago, Textile Discount Outlet, and when I left empty-handed was highly disappointed. However, I didn't give up and visited three other large fabric stores warehouses, perused the selections at Hobby Lobby, and even stopped at Joann's—still nothing. Then one magical weekend when we were up in Minnesota paying a visit to our friends and family, I was venting my fabric-finding frustration and my friend's boyfriend mention a store in the area that may have something. To all y'all that live in the Twin Cities area, and have a fabric fetish but don't know where to look, let me introduce you to Mill End Textiles (this is the Rochester store).


I hope the photos speak for themselves, but let me tell you that the selection there was fantastic. The Rochester store wasn't extremely large but I easily found fabric for the chair cushions as well as another project I had been needing fabric for. The best part, it was a holiday weekend and everything was discounted on-top of the already terribly low prices. We bought 4 yards for the chairs and only paid $20 and probably have at least 1.5 yards of fabric left. Woo hoo!

With that checked off my list, the next tasks I completed were purchasing foam and finding a box-cushion sewing tutorial online that I could follow easily. Unfortunately, foam is not cheap so I patiently waited for it to go on sale at Joann's and when it did, I was on it like peanut butter on jelly. In the meantime, I found this great tutorial on Sew Mama Sew and read it about a hundred times. I followed the steps to a T, omitting the handles, making one of the seats first. Can you guess which one (I hope not!)?


I am so please with my work not only because this project was a huge skill- and time-undertaking (it took about three hours to make one cushion) but because I think I did an excellent job for a first-timer and now we have two more functioning chairs! What do you think? Did you ever think I would actually finish this project?

BTW: According to Urban Dictionary, "cushed meanz dat u feel comfortable".
Related Posts with Thumbnails